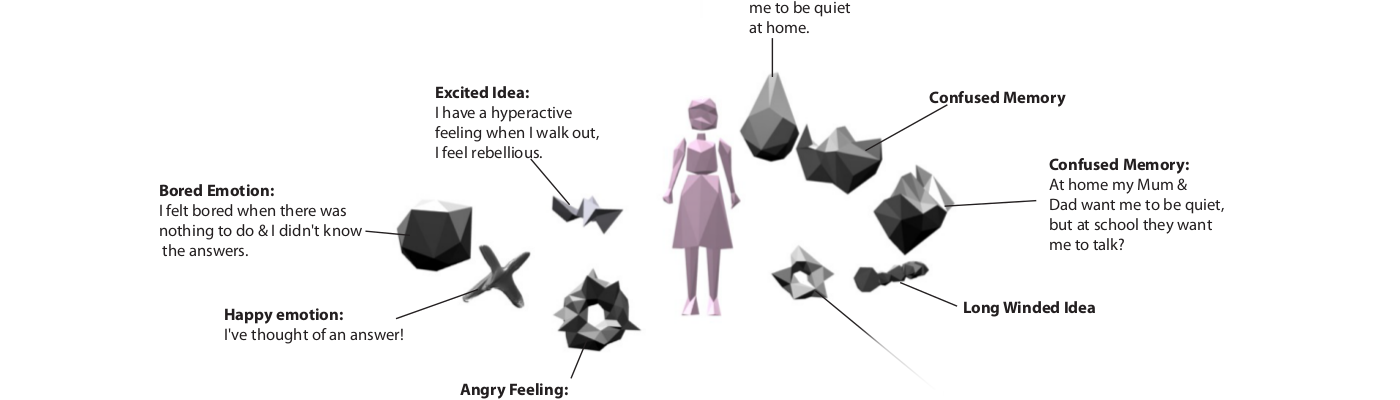
Sculpting 3D thoughts in Blender
This guide shows you how to sculpt 3D shapes representing thoughts in the open source 3D design tool Blender.
![]()
You will need.
- Blender installed on your computer
- largeblob.blend
Getting started
Open – largeblob.blend
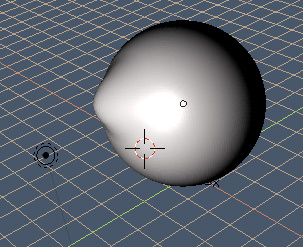
The 3D Window
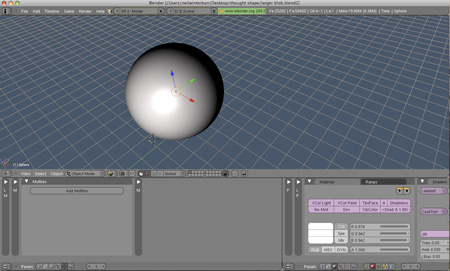
The top window should show a white sphere on a 3D grid, this is known as the 3D window.
There is another set of windows underneath it, but we don’t need to bother with them at the minute.
Zooming
Zoom in: To zoom in you push two fingers up the trackpad – no need to click anything
Zoom out: To zoom out you pull two fingers back on the track pad – no need to click anything.
Have a go at zooming in and out.
If you get lost you can choose to ‘Go Home’. There is away to return to where you started,in the menu at the bottom left of the 3D window,go to ‘view/view all’
Undo: If you accidentally click the wrong thing, just let go of the keys & mouse, then click ‘CMD & Z’ at the same time, this is the
Panning: To ‘pan’ the camera view – which means move the scene left, right, up and down hold down ‘Shift + Alt’ then ‘Left mouse click and drag’
Rotate: To rotate your point of view, hold down ‘Alt’ then ‘Click & Drag’ on the edge of the grid.
Practice zooming in & out, then panning the scene, and then try to use rotate to look all the way around the sphere.
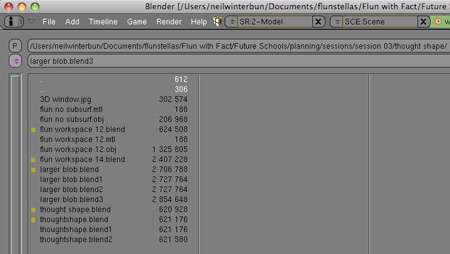
Saving
Save the file with a new name by going to the menu at the top left of the screen, and clicking ‘file/save as’.
To navigate to a different place on the computer, use the file window as normal, except ‘p’ = up a level.
The ‘save as’ button is at the top right of the screen.
3D Nets
Zoom into the large sphere shape in the 3D window by pushing two fingers forwards on the track pad.
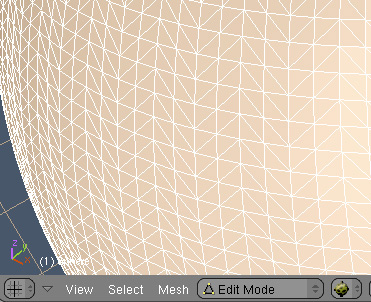
The sphere looks very smooth, but it is actually a huge mathematical net.


If you click on the ‘object mode’ tab at the bottom of the 3D window, and select ‘edit mode’. You will see that the ball is made up of 100’s of tiny triangles.
Hold down ‘Alt’ then ‘Click & Drag’ to have a look around it.
All the characters and objects that you see in computer games and digitally animated films are made from these kinds of nets.
Practicing sculpting your shape
Click on the ‘edit mode’ tab and change it to ‘sculpt mode’.

In the window below the 3D window, click on the ‘sculpt’ tab.
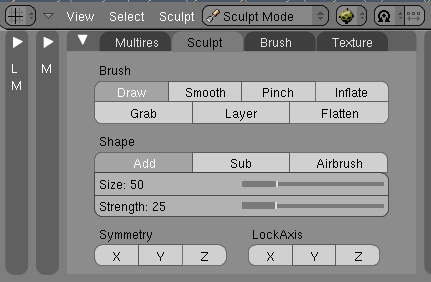
There are three panels in this window we will use ‘Brush’ & ‘Shape’
Grabbing
In the ‘Brush’ panel select ‘grab’ – you know which brush you have selected because it goes a bit darker than the others.
In the ‘shape’ panel you can choose how big your grabber is, choose a number.
If you ‘click and drag’ on the ball shape you will be able to drag it, like it is putty.
Once you have sculpted the shape a couple of times, hold down ‘Alt’ then ‘Click & Drag’ to rotate around your shape, have a look around the shape now you have altered it.
Sculpt the shape by grabbing it in different ways using different sizes and strengths.
Remember if you do something you don’t like you can ‘undo’ by pressing ‘CMD & Z’.
In the sculpt panel there are other tabs that you can select to sculpt your shape.
Inflating
You can inflate your shape, by selecting the ‘inflate’ tab.
Once you have choosen how much you want to inflate the shape by, click and hold on the surface of the shape where you want to inflate it.
![]()
Experiment with different sizes and strengths of inflation.
Flattening
You can flatten your shape, by selecting the ‘flatten’ tab.

Move your mouse to the part of the shape you want to flatten, and click and hold. The longer you hold the more the shape will flatten.
Experiment with different sizes and strengths of the flatten brush.
Changing Colour
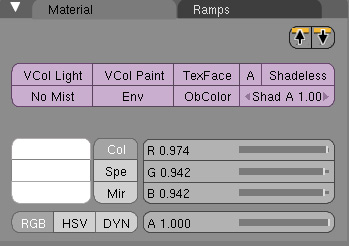
In the bottom right hand corner is the ‘material’ window. We can use this to decide what colour our shape is.
In the bottom left hand corner of this window are three buttons, called ‘Col’, ‘Spe’ & ‘Mir’.
Click on the white tab to the left of the ‘Col’ button & choose a new colour for your shape.
When you are happy with your colour press ‘enter’ on the keyboard.
Save your .blend file by going to file/save as or file/save.