03 Using Sketchup Models to design a Room in StarLogo TNG
This guide will show you how to create a cafe space in StarLogo TNG using models from the SketchUp 3D Warehouse.
SketchUp is free and easy to use 3D design software. People share models on the 3D Warehouse in much the same way that people share video on YouTube.
Before you use this guide you should look at Getting Started with StarLogo TNG & Importing 3D models of Thoughts into StarLogo TNG
Go to the SketchUp 3D Warehouse.

Search for the kind of furniture models you want to put in your space. For this guide I’m making a cafe space, but Flunstellas appear in all kinds of spaces, so you might want to design a different kind of set.
To save a thumbnail to be used in StarLogo TNG, right click on the picture of the model and save it.
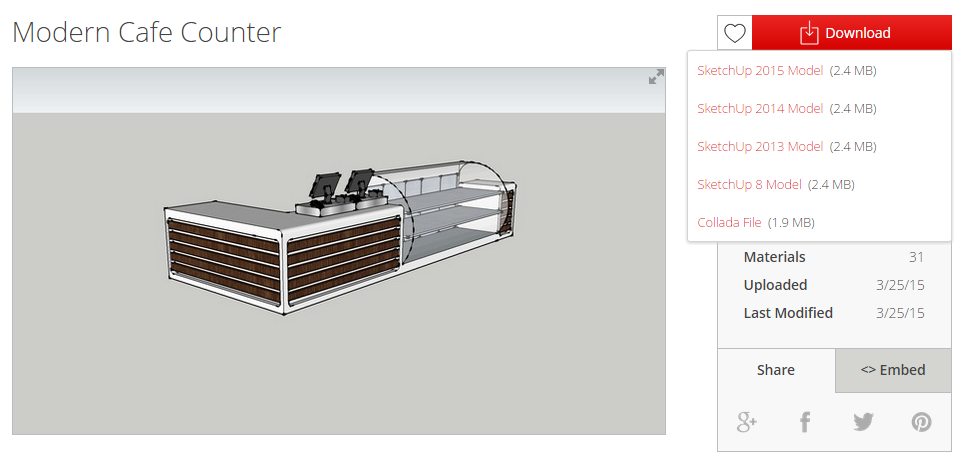
Click on the red download button and select to download either a Google Earth .kmz model if it’s available or download a SketchUp model.
In SketchUp
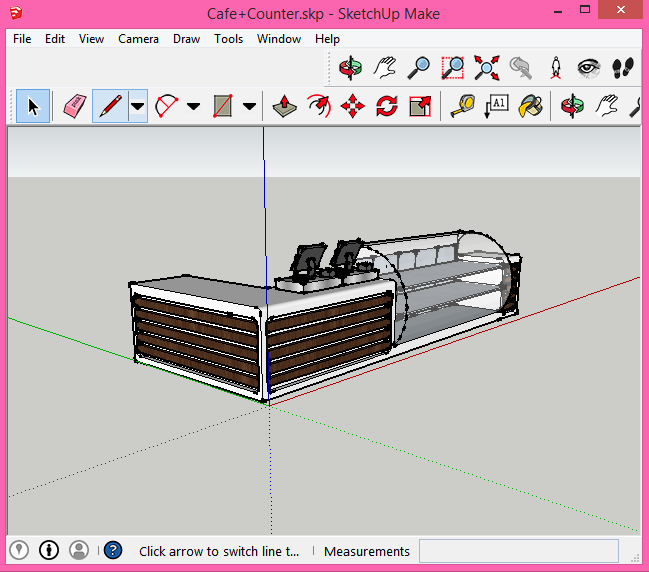
Open the model in SketchUp.
Export it as a Google Earth .KMZ file, go to File/Export/3D model & select .KMZ.
In StarLogo TNG
Open StarLogo TNG.
In the Blocks window click on ‘Breeds’.
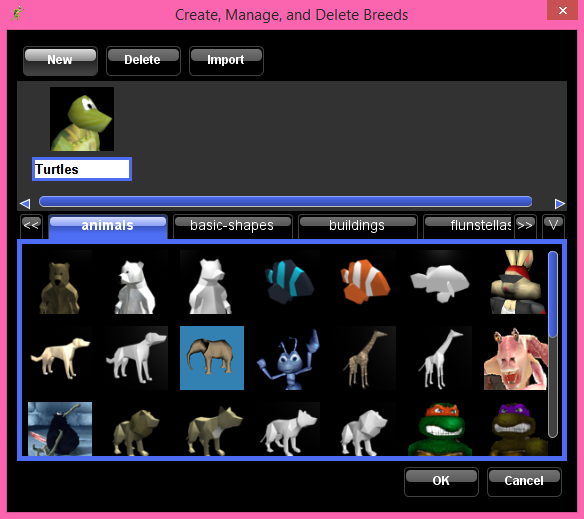
Click on ‘Import’.
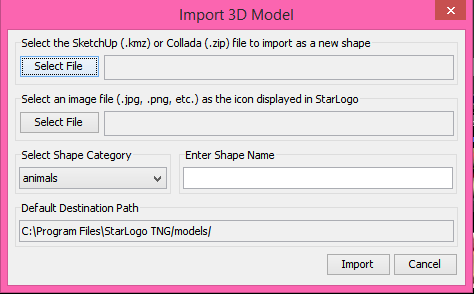
Using the import form navigate to your .kmz model and thumbnail.
Give your model a name and select the ‘Objects’ shape category.
Click ‘Import’.
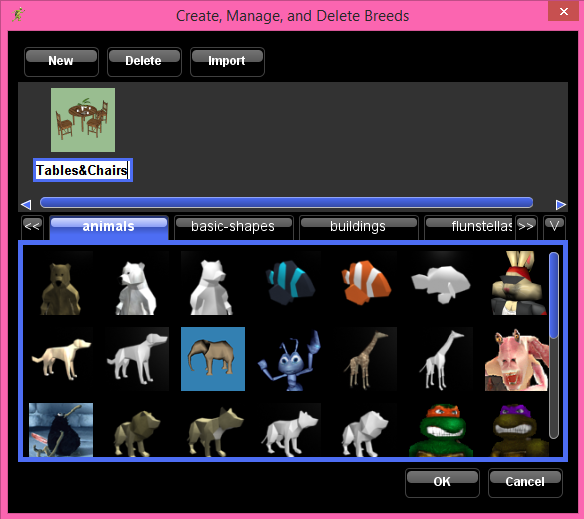
You should now see your model thumbnail in the top row of thumbnails. Give it a name and click ‘ok’.

Repeat this until you have brought all of the models you want to place in the room.
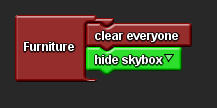
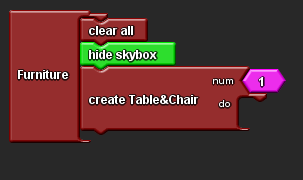
From the ‘Setup and Run’ drawer drag out a red ‘SetUp’ block onto the SetUp page on the canvas. Rename it I’ve called mine furniture.
Drag out a red ‘Clear Everyone’ block from the ‘Setup and Run’ drawer and a green ‘Hide Skybox’ block from the ‘Terrain’ drawer and place them in the SetUp block. This tells StarLogo to clear all of the models from the project and to set the background to black.
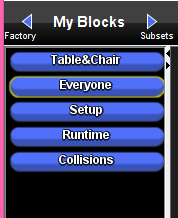
Click on the blue arrow to the right of the word Factory to open the ‘My Blocks’ pallette.
Open the blue drawer for your 1st model and drag out a red ‘Create Do’ block. Place it inside the SetUp block and change the ‘Num’ value to 1.
In the SpaceLand window click on the Furniture (or whatever you have called it). Your model will have appeared in the centre of SpaceLand. It will be very small.
Zoom in to your model by clicking the + button in the bottom right hand corner or pressing the mouse wheel forwards.

Click on the model to open up the inspector window. Zoom back and change the values in the ‘XCor’, ‘YCor’ & ‘Size’ until the model is positioned where you want it to go.
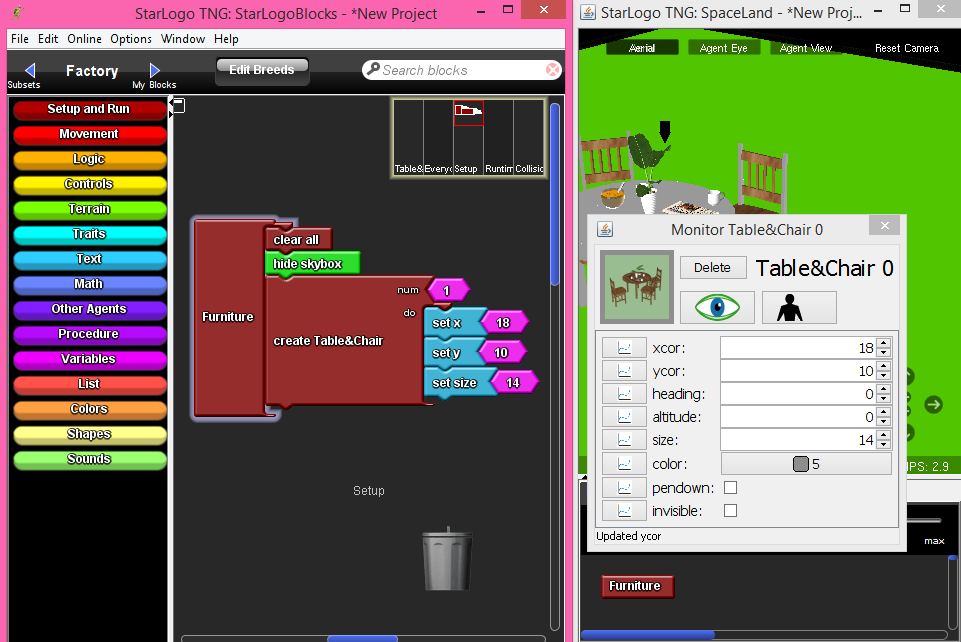
In the Blocks window, drag out a blue ‘SetX’, ‘SetY’ & a ‘Size’ block from the ‘Traits’ drawer.
Change the values for those blocks to be the same as the Xcor, Ycor & Size values for the models from the inspector window.
In the SpaceLand Window, click on the ‘Furniture’ block. Your model should appear at the location and size you have set.
Repeat this process with all of the models that you want to bring into your room.
Changing the colour of the floor
In the bottom left hand corner of the SpaceLand window, click on the ‘Drawing’ tab.
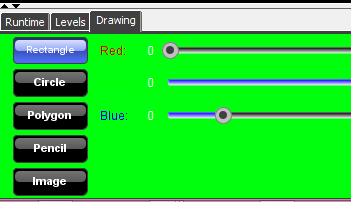
Move the sliders for the red, green and blue values of the paint tool.
Select rectangle & click and drag across SpaceLand to change the colour of your floor. This works better when you are dragging upwards, so you may need to rotate SpaceLand to do this using rightclick and drag.
Populating the space with Thoughts
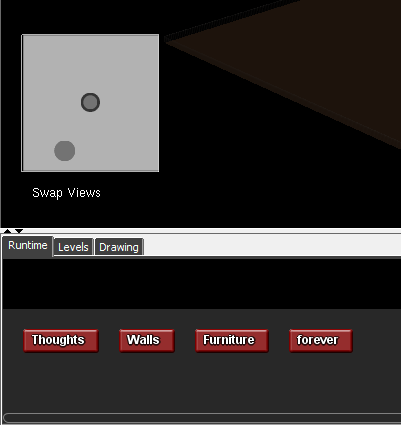
To populate this space with thoughts, click on ‘Edit Breeds’ and then click ‘New’ to create a new breed.
Navigate to the Flunstellas model folder if you have one, if you haven’t placed a folder of Flunstellas models in the StarLogo TNG models folder then follow the ‘Seting Up a room of Flunstellas’ guide. Make sure that you click the new button before adding each new Flunstella breed.
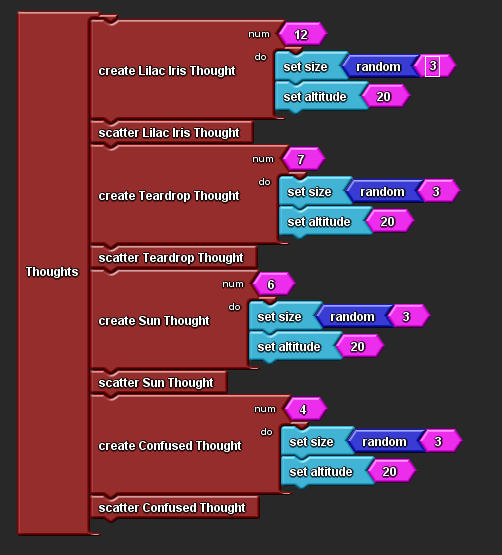
In the SetUp page drag out another red ‘SetUp’ block from the ‘Setup & Run’ drawer and rename it thoughts or something similar.
Open the ‘My Blocks’ pallette and drag out a ‘Create Do’ block for each thought you have added to the breeds list.
Change the number value to the number you want of each type of thought.
Drag out a blue ‘Set Size’ and a ‘Set Altitude’ block from the traits drawer.
Set the altitude value, this is how high the thoughts are from the ground. If you want the thoughts to interact when you program them with behaviours, it helps for them to have the same altitude.
Set the size value. If you want some random variation drag a blue ‘Random’ block out from the ‘Maths’ drawer, this will give you a random number between 0 and the number you set to random.
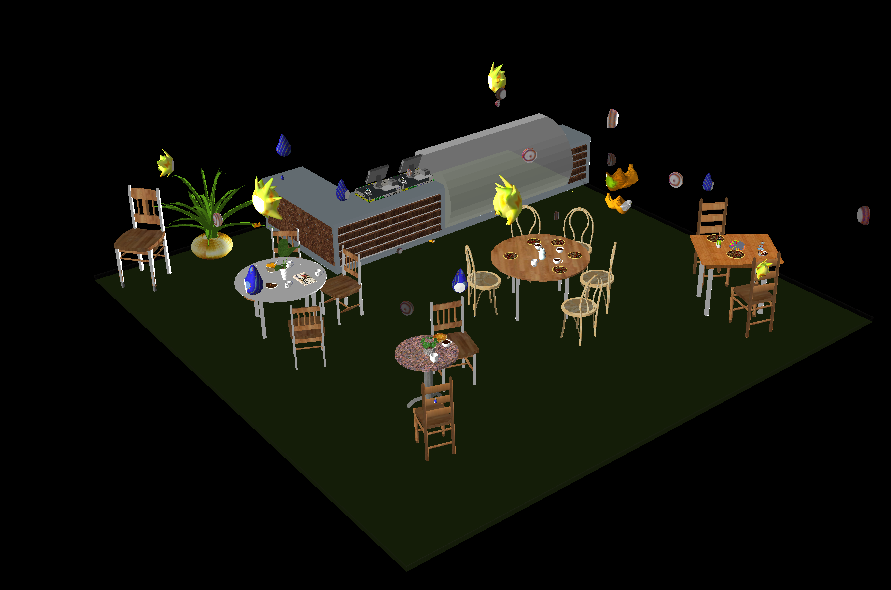
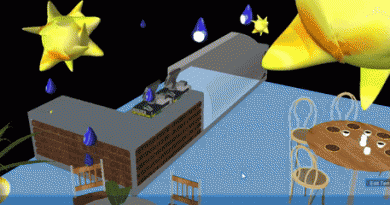
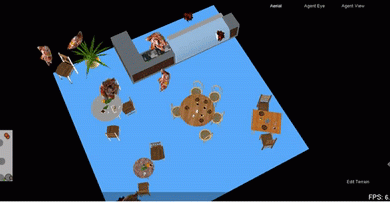
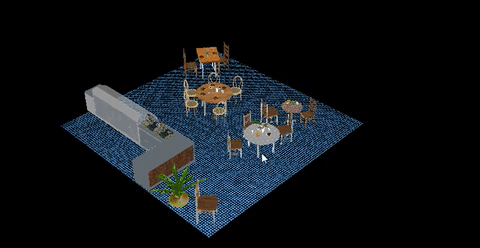
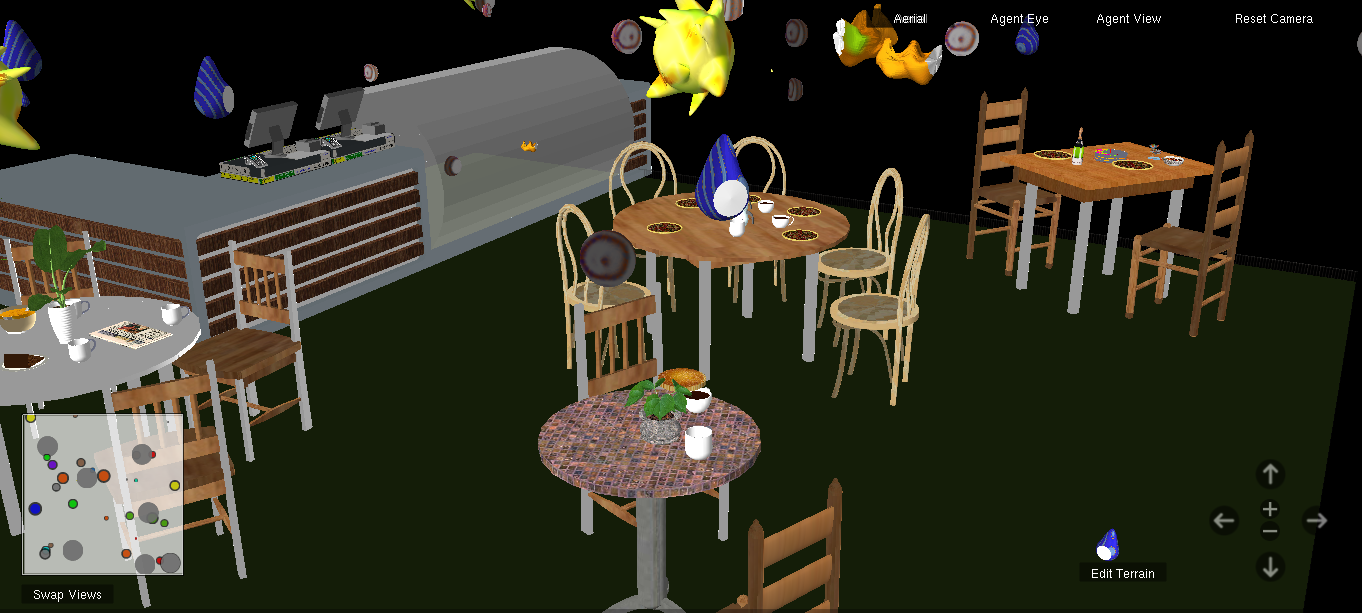
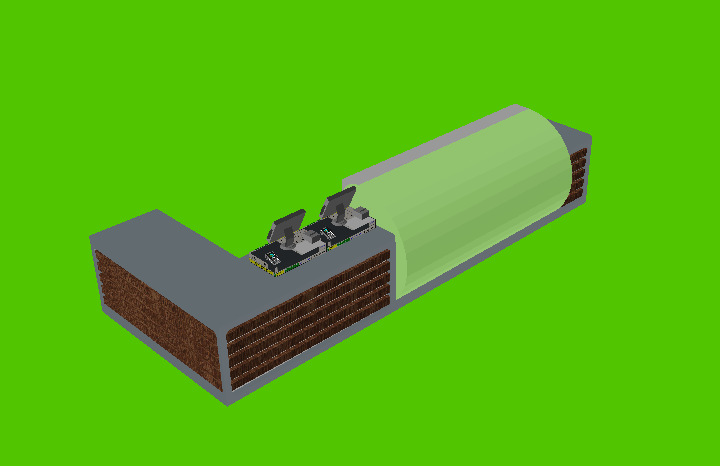
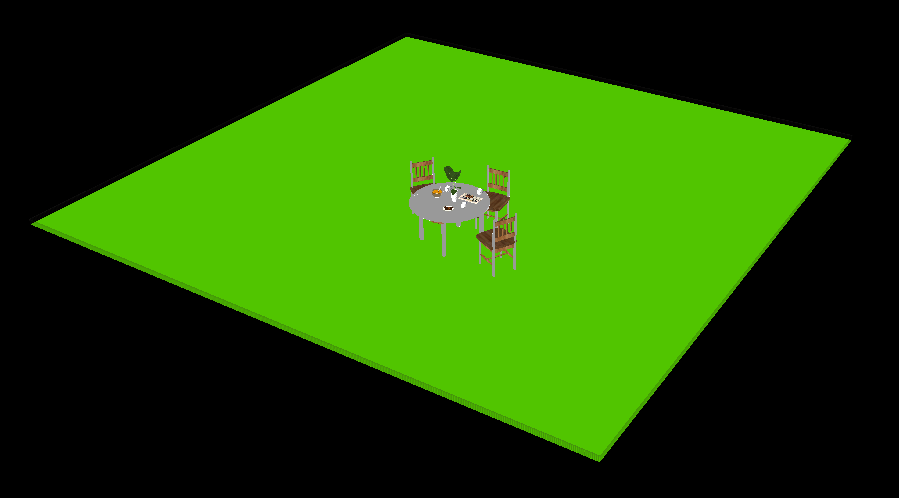
A cafe space populated with floating thoughts in StarLogo TNG.
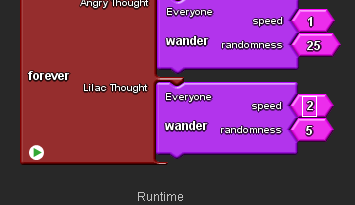
To explore how these thoughts might behave and interact with each other have a look at these guides.
Program thoughts to wander in StarLogo Tng
Program thoughts to change when they collide in StarLogo TNG
Program thoughts to chase or avoid each other in StarLogo TNG